Your Wedding Table Seating Chart: A Step-by-Step Checklist
The seating plan is the task that brings everything else to a halt.
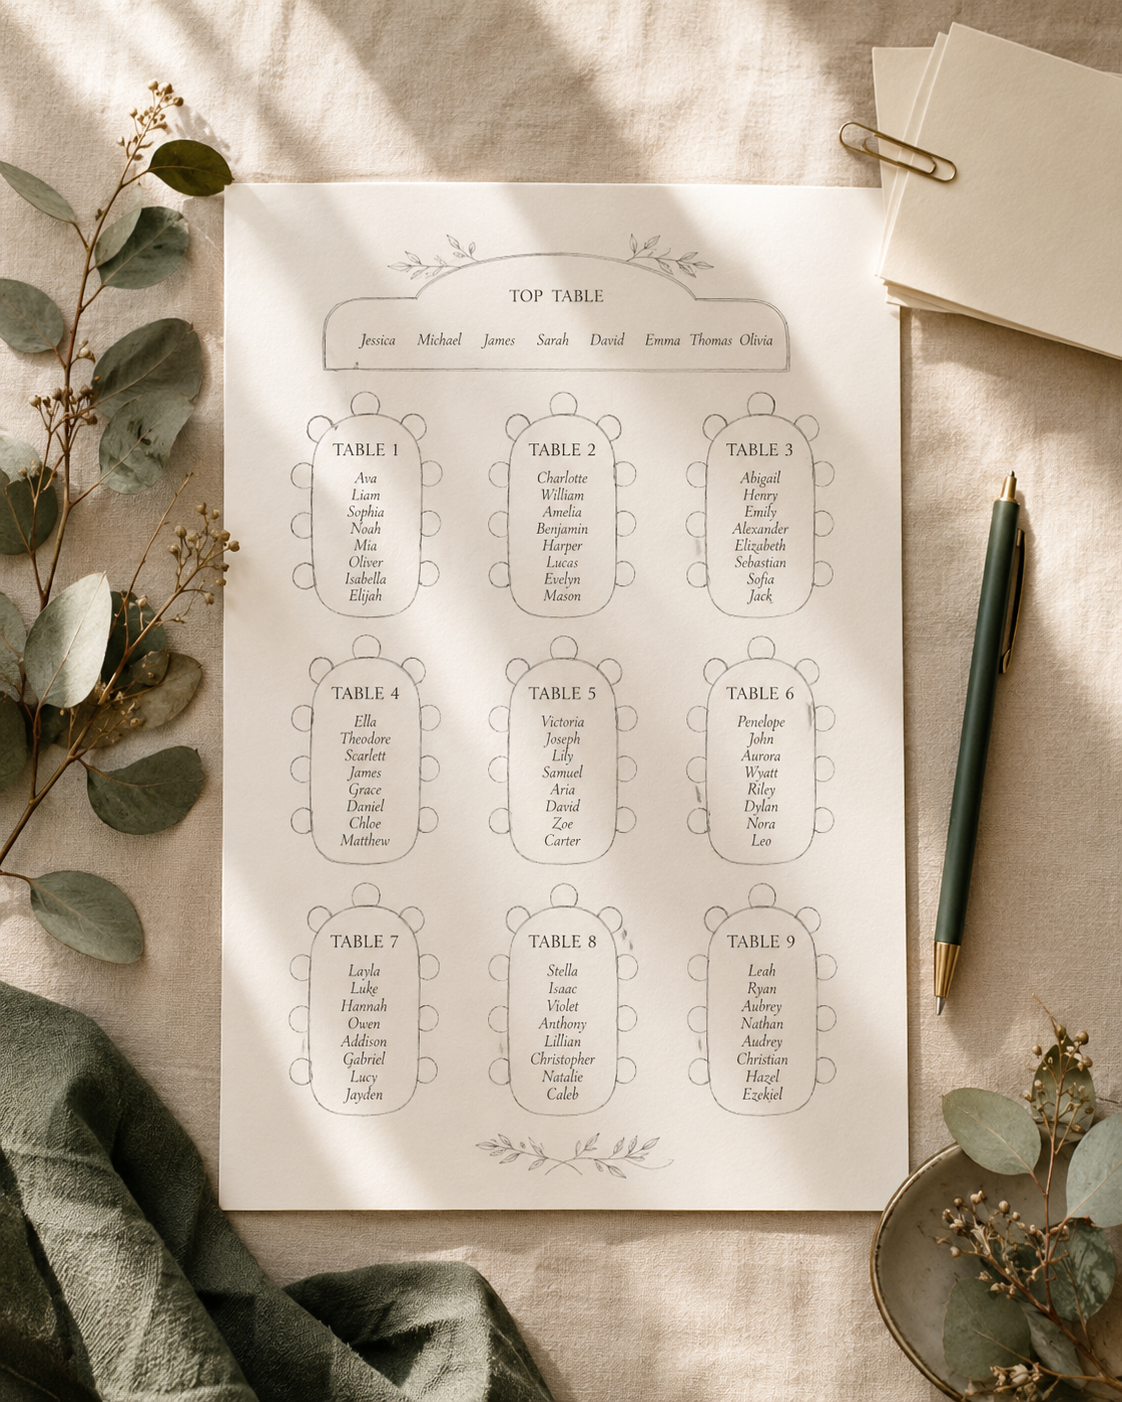
The wedding table seating chart tends to be the one task that brings everything else to a halt. You have the venue, the dress, the flowers sorted, and then you open a blank spreadsheet and the names stare back at you. Where do you even begin?
The answer is: not with the names. A table seating chart works best when you begin with the conditions. Get three things confirmed first, then work through the steps below in order, and the plan will come together far more calmly than you expect.
The short answer: lock RSVPs, centralise dietary requirements, confirm your table layout, assign guests to tables by group, assign specific seats where it matters, sense-check the whole plan, then produce a handover pack for your venue and caterer. Do them in that order and you avoid most of the rework.
Before you start: grab the free checklist
If you want a printable one-pager to work through alongside this guide, we have put together a free Wedding Seating Plan Starter Checklist. It covers every phase below in a format you can print, tick off, and hand to a family member helping you on the day.
Before you start: what you need in place
Trying to build a table seating chart before these three things are confirmed just creates work you will repeat later.
You need:
- A closed (or very nearly closed) RSVP window, so your guest count is final
- A confirmed venue layout, including the number and size of tables
- Clarity on whether meal choices are pre-selected or served on the day
If your RSVPs are still drifting in, skip ahead to Step 1. If your venue layout is still provisional, ask your coordinator for a floor plan as soon as you can. You cannot sensibly assign 90 guests to tables you have not yet confirmed exist.
Step 1: Lock your final guest list and RSVPs
Chase any outstanding RSVPs with a firm, friendly deadline. Two weeks before you need to start the seating plan is a reasonable buffer. If you have not heard from someone by then, make a reasonable assumption (or give them one final call) and mark them as attending or not attending. Do not leave the list open indefinitely.
Once you have your confirmed list, mark it closed. Update any planning documents to reflect the final headcount and note any plus-ones, children, or late additions.
A checklist for this step:
- Set a firm RSVP deadline and communicate it to any stragglers
- Confirm yes/no for every name on the list
- Account for children and confirm whether they need a seat at a table or a highchair
- Note any guests who confirmed but have since cancelled
- Record your final headcount
Do not start assigning tables until this list is fixed. Moving guests around mid-plan because a new RSVP came in is one of the most common causes of seating-plan chaos.
Step 2: Collect and centralise dietary requirements and allergies
This is the step most couples underestimate. Dietary information tends to arrive through several different channels at once: the RSVP form, a WhatsApp message from a bridesmaid, a note from a parent, an email from a guest you barely know. The result is that the information exists, but it is scattered.
Bring it into one place before you start the plan.
What to collect for each guest:
- Meal choice (if pre-selected): starter, main, dessert
- Dietary preference flag: vegetarian, vegan, pescatarian
- Specific allergens: nuts, gluten, dairy, shellfish, eggs
- Severity: preference vs. intolerance vs. severe/anaphylactic allergy
The severity distinction matters. A guest who prefers to avoid gluten needs something different from a guest who will have a medical emergency if a plate is not handled separately. Your caterer needs to know which is which, and so does whoever is briefing the serving staff on the day.
If you are tracking all of this in a spreadsheet, you will likely be colour-coding cells manually and hoping nothing gets overwritten. The Vow & Vine Seating Planner handles this automatically: severe allergies are highlighted in the tool and pulled into the caterer handover report so nothing slips through.
Step 3: Decide your table configuration and sizes
Before a single name gets assigned, you need to know what you are working with. Go back to your venue floor plan and confirm:
- How many tables are there, and what shape are they? (Round tables typically seat 8 to 10; rectangular or banquet tables vary more widely by length.)
- Is there a top table, and if so, what format? (Traditional top table, sweetheart table for two, or a round "family table" in the middle of the room?)
- Are there any fixed constraints? (A pillar that blocks sightlines, a space near the kitchen entrance that guests will notice, a corner that feels slightly cut off from the rest of the room.)
Make a simple list: Table 1, seats 8. Table 2, seats 8. And so on. This gives you the actual slots you are filling, rather than an abstract guest count. If your venue layout is digital, print or screenshot it so you can refer to it as you work.
Step 4: Assign guests to tables (not seats yet)
This is the main event, and it is less daunting when you treat it as two separate tasks: first tables, then seats. You do not need to know who sits next to whom at this stage. You just need to know which group of people belongs at which table.
A practical approach:
Start by grouping guests naturally: the couple's school friends, the partner's work colleagues, the partner's cousins, elderly relatives who would enjoy each other's company, and so on. Then place each group at a table, adjusting sizes to fit your table capacities.
A few common situations worth planning for:
Divorced or separated parents. Give each parent their own table where they can be with people they know and feel comfortable. They do not need to face each other across the room, but they do not need to be hidden away either. A good rule: treat each parent as a separate social unit and seat them accordingly.
Guests who do not know anyone else. Do not seat these guests at a table where everyone else has strong existing bonds and will naturally form a closed group. Place them somewhere mixed, ideally near at least one sociable person you trust to draw others in.
Mixed families. Step-parents, half-siblings, and extended blended families often need a little extra thought. The goal is that everyone has at least one person at their table they genuinely like.
Work through the plan table by table until every name has a table. Do not worry yet about who sits where within the table.
Still in early planning? The free Wedding Seating Plan Starter Checklist is a printable one-pager that walks through each phase above — useful to have to hand while you work.
Step 5: Assign specific seats where it matters
You do not always need to assign individual seats for every guest. Many couples do table assignments only, and that is perfectly workable. However, specific seat assignments are worth doing in these cases:
- The top table (or sweetheart table): assign seats clearly so everyone knows where to go on the day
- Close family tables: elderly grandparents, parents, siblings, and anyone with mobility needs should know their exact seat
- Accessibility requirements: guests who use a wheelchair, have hearing difficulties, or have any condition that affects where they can comfortably sit should be placed with care and their seat should be confirmed in writing to the venue
If you are doing full seat assignments, do them table by table. Finish one table before moving to the next. This keeps the task manageable and reduces the chance of accidentally placing two guests in the same seat.
Step 6: Sense-check the plan as a whole
Before you finalise anything, walk through the plan from start to finish. This step catches the things you stopped noticing because you have been staring at names for an hour.
Check each table in turn:
- Does every guest have at least one person they know at their table?
- Is any guest isolated or placed somewhere they will clearly be uncomfortable?
- Are all dietary flags visible and correct?
- Is the top table seated in the intended order?
- Are accessibility needs correctly reflected in the layout?
Then step back and look at the room as a whole:
- Is the balance of family and friends reasonably spread, or is one side of the room entirely one family?
- If one guest cancels last minute, will the plan still hold without leaving a visible gap at an otherwise small table?
- Does anything feel like it was placed there just to fill a gap rather than for any good reason?
Fix anything that does not sit right. This is the last chance to change things before the plan goes to the venue.
Step 7: Create your caterer and venue handover pack
A wedding seating plan is only useful if the people who need it can read it clearly. Your caterer and venue coordinator need specific documents, and they often need them in a particular format.
What to prepare:
- Table layout diagram showing table numbers or names and their position in the room
- Alphabetical guest list with table assignment for each person (used on the day if guests cannot find their name card)
- Dietary and allergy report listing every dietary requirement, flagging severe allergies clearly
- Meal choices by guest if pre-selected (often needed by the kitchen to prepare and plate correctly)
Confirm the exact deadline with your coordinator as soon as your plan is complete — most venues and caterers ask for the final seating plan one to two weeks before the wedding.
Who gets what: your venue coordinator typically needs the full pack. Your caterer specifically needs the dietary/allergy report and meal choices. Your on-the-day coordinator (if you have one) should have the alphabetical list.
The Vow & Vine Seating Planner generates all four of these documents as a print pack in one step, so you are not manually copying data from a seating chart into a separate dietary spreadsheet.
Frequently asked questions
When should I send my seating plan to the caterer?
Most venues and caterers ask for the final plan one to two weeks before the wedding — confirm the exact deadline with your coordinator early. If your caterer also needs meal choices, give yourself at least three to four extra days to compile the dietary report accurately rather than rushing it at the last minute.
Do I need to assign individual seats or just tables?
Table assignments only are perfectly workable for most guests. Specific seat assignments are worth adding for the top table, elderly or mobility-affected guests, and anyone with an accessibility need that affects where they sit. Beyond those groups, leaving guests to choose their own seat within a table is common and saves a significant amount of planning time.
What if a guest cancels after I have finalised the plan?
Check whether removing them leaves a table noticeably short. If a table drops to five or six guests and all remaining tables are at eight or nine, it may be worth redistributing one or two people to balance the room. Otherwise, simply remove the guest, update your dietary/allergy report, and send a revised copy to your caterer and venue. Keep a note of the change and when you made it, in case there is any confusion on the day.
The tool that handles most of these steps for you
If reading through this checklist has made you realise that managing all of it manually is going to involve a lot of tab-switching and formula-checking, there is a simpler way.
The Vow & Vine Seating Planner is a browser-based app — no install, no subscription, one-time purchase at £21.99 — built specifically for this process. You import your guest list from CSV, drag guests into seats on a visual canvas that mirrors your actual venue layout, track meal choices and dietary flags per guest, and print the complete handover pack when you are ready. Severe allergies are automatically highlighted so they cannot be missed.
It is not a spreadsheet. Nothing breaks, nothing needs reformatting, and you do not need to rebuild the whole thing if a table size changes.
If you are still in the earlier stages of planning and want everything in one place — checklist, budget, guest list, timeline, and the seating planner included — the Vow & Vine Wedding Planner Suite covers the full journey from engagement to the morning of the wedding.